Pages

Monday, January 23, 2017

I'm moved!!!

Hello all!  I’m moving my blog space to my new home {  www.juliemogford.com }  I hope you will join me there! :)

Julie

Monday, November 10, 2014

Creative Blog Hop and Celebrating Fabulous Artists

Happy Monday, everyone!  Today I'm playing along in a Creative Blog Hop!  After all of these years, I can't believe I'm participating in my first hop of this kind.  I always enjoy reading these on other crafter's blogs, but this time, I will be sharing a bit about me, and then celebrating a few ladies I've come to know in the online crafting world.  I'm so excited!

First, I want to let you know that I was invited to this hop by a dear sweet friend of mine named Melinda Miller (but I call her Mindy) and she wrote a very nice intro about me and two other artists, plus answered a few design questions too.  You can check out her blog post here.  I have known Mindy for years and we first met shortly after I moved to San Antonio .  She worked at Stamp Antonio, a local craft store carrying stamps, inks, papers, and so much more.  I always enjoyed walking in to the store, and being greeted by Mindy's cheerful voice and spending time looking at all of the new products, especially Hero Arts and Amuse stamps (back when they were in stores).  We would also attend workshops held in the store and get time together to enjoy crafting, plus we were also in an ATC group, headed by my winnie & walter co-owner, Shay. 

Mindy also introduced another artist in her post that I met at the same time - Carrie Avery.  Carrie, her sisters and mother were the heart and soul of Stamp Antonio back when I first started shopping there (conveniently located near where I work *wink*).  Many a Wednesday night and Saturday have I spent there learning from Carrie and her sisters about inks, crafting techniques, and making some of the cutest projects on the planet.  Carrie is so talented and I have learned so much from her.  She started her own company, Paper Wings Productions.  This store carries both clear and red rubber cling stamps, clip art sheets and mixed media products, and sells monthly kits too!  Shay and I have both designed stamps for Carrie's product line, so this company has a special place in my heart.  I wish Carrie continued success with her company and with her art workshops.


It's Me - Julie


Creative Hop Questions:

1.  What am I working on right now?  Currently we just released 9 new stamp sets, 4 new dies sets called Cutaways and 19 new stencils called Creative Screenings.  Plus, I'm working on new designs for upcoming releases.  I still create projects for our winnie & walter releases but haven't been posting them here. I have a few things brewing at the moment and hope to start revealing them here on my blog soon.

2.  How does my work differ from others in my genre?  This is a tough question!  I will admit that I have a few original moments in my creations, but I really am inspired by what I see others create. I try to include dies as a featured element on my cards lately, and not necessarily the stamps, but I think that is just me pushing myself to take a step away from what I usually do.  I like to challenge myself like that.

3.  Why do I create what I do?  I've always loved crafts, from projects at school, in Girl Scouts, with my Mom or my Grandmother.  I find that I look at art and at first look I'm seeing the beauty, but then my mind starts to look at it and think, "how did they do that?", which then leads to "I want to make that too". This feeds my soul.  (I see myself doing it in my technology teacher world too.)  In my adult crafting years, I started with scrapbooking with Creative Memories products, but as much as I love scrapbooking, I wanted immediate gratification.  Then I started stamping and became a Stampin' Up! demonstrator for a short time, but when I moved, I couldn't find a client base.  I kept stamping and creating because I loved making cards and little projects for people. I can remember looking at stamps and thinking how cute they were and also wishing the sets included something extra that wasn't there.   I don't think I ever thought that I would start a stamp business, but it is amazing to be part of this world in this way.  So, I create what I do to make myself happy (feed my soul) and to give others something that makes them happy too!  It's about love!

4.  How does my creative process work?  Oh my!  Usually, too much time on Pinterest!  LOL  I see so many things on there that give me inspiration, and then, I spend so much time, I don't get any crafting done.  :)  For designs - usually starts with some brainstorming with Shay, and then lots of drawing.  For cards, scrapbooking and art journaling, it could start with a product I have been hoarding, some art or project on Pinterest or a blog, or a sketch or color combo.  I'm messy - so messy!  I tend to let things pile up on the desk, and then some projects evolve based on what is now on my desk.  While I'm crafting, I can usually be found singing along with my favorite Pandora radio stations or watching/listening to ony of my many favorite romantic comedies.

Enough about me!  Now, I would like to introduce you to some of my new creative friends that I have met online this year.  They are lovely ladies, and super talented!  Here is a brief intro about each of them.  But, there is a catch - all of these lovely ladies have already participated in this Creative Blog Hop prior to my invitation.  I'm must be a little late to the game!. LOL  So, I have links to their recent responses to share with you today.  This will most likely close the loop on my end, but the bonus is that you can learn about their favorite artists too since they have already responded.  You are in for a shower of creativity and inspiration.  Let's get started!


ShirleyBampton


First I have Shirley Bampton. What a lovely lady!  I first saw Shirley's talents when she submitted creations using winnie & walter products and WOW, let me just say that she is such a clever artist.  I love the ideas she comes up with!  She has been a guest designer for w&w in June and in October, and is on several design teams and has won numerous awards for online challenges. I'm a huge fan of her projects that have a watercolor look to them, and boy can she do fabulous things with stencils!   Be sure to check out her post here!


LeaLawson-DTCoordinator


Another of my favorites is Lea Lawson.  Lea is a wedding and engagement photographer and an amazing paper crafter. When I see a project from Lea, I am struck by the way she brings her elements together, and sit in awe.  Then, I'm also in love with how her projects are photographed.  Lea, I could use some tips in both of these areas!  Currently, she is on the w&w design team, as well as My Mind's Eye and Lil' Inker Designs, but has been on many other fabulous teams in the past.  Some of my favorite styles from her are when she does white on white, or projects with an ethereal look.  She is so sweet and talented. Check out her post here!


Suzanne photo


When Mindy asked me to join in on the blog hop, I have to admit that Suzanne Dahlberg was the very first person I thought of to add to this talented list of artist / crafters.  Suzanne is a cancer researcher by day, and super cute paper crafter in her spare time.  She was a design team member for w&w in the very beginning, and now she is on the Waffle Flower design team and is a "free agent" for us, meaning she could drop in from time to time to share her talents using w&w products!  We became fast friends, and I enjoy keeping up with her by email.  I love her use of color and her sweet and fun card style.  Check out her post here!

Five fabulous artists you must check out (and their picks too)!  I hope you enjoyed hearing a little more about me and a little about them too.  If you haven't joined this blog hop, I hope you will jump in and tell me a little more about you and share a post about your favorite artist/crafters too.


until next time....

Julie

edited to add:
So sorry the photo links were broken.....now you can see these lovely ladies! - Enjoy!

Sunday, November 2, 2014

Changes on the Horizon

Hello all!

I have sorely been neglecting my blog, but all for good reason - my focus has been directed toward Winnie & Walter!  So much has been happening since I was last on my blog, so here is a quick update:


  • Finished off the school year and worked nearly all of the summer implementing new protocols to help make Technology Coordinating a little easier, and definitely more up to date. It was lots of work, but all for the best
  • Foundation issues on the house - stressful!!!
  • Attended an Educational Technology workshop hosted by Tammy Worcester Tang in Houston, so I was able to spend the weekend with my family.  It was great to see everyone and Kamilla is growing so fast.  She had such a good time playing with Walter too!
  • I've been working nearly non-stop with Shay on designs and products for Winnie & Walter.  We have had several releases, including our most recent Holiday release, which went live on October 31st.  It is full of fun holiday images, plus we have introduced our line of stencils called Creative Screenings and our dies called Cutaways.  Things are really hopping over at the w&w blog.
  • We recently hit a huge milestone - 1000 likes on Facebook!  

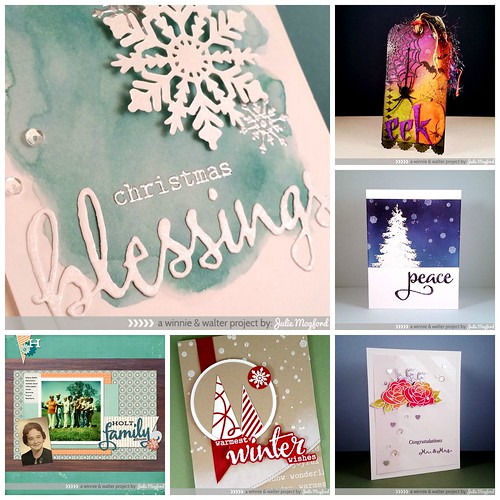
jmog_sw_blog collage oct


Somethings that are on the horizon....


  • changes to this blog - keep stopping by for more to come in that area - design and content updates - yea!!!
  • new ideas and products for people who like creative ideas - great for teachers, crafters, and just about anyone.
  • look for updates to my facebook page too.
Hope to see you again very soon.  

Julie

Saturday, March 8, 2014

March Madness...

Hi y'all !

It's March Madness around here, and I'm not talking basketball (even though I like basketball :) ).  I missed a good Spurs game this Thursday night, but it was all for the greater good.  The "madness" is a combo of my day job duties and my new business duties.  Lot's to do and not always enough time to do them.  That is why I am super happy to have this week - SPRING BREAK -  to get some things done, take a little time for me, and I am getting a visit from the family!  It is a real treat to have them come here since we usually travel to see them in Houston.  It will be so much fun to see them, have some much needed family time, and see Walter and Kamilla play.  I'm hoping the bluebonnets will be blooming a little, because I would love to get photos of Walter and Kamilla with the flowers.

It has been super busy over at Winnie & Walter!  Our first release has been a huge success and we have had such wonderful feedback plus some amazing and exciting things happening lately, and soon to come.  Here are a few highlights!

Lots of new fans on facebook!  So exciting to see how many people are finding us and liking our product!

w&w facebook status 3-8-14


Our stamps will be featured in the upcoming Online Card Classes - Clean & Simple One Layer Cards 3 - this came as a HUGE surprise.  I found this preview image of the class on Jennifer McGuire's blog late on a Saturday night, and was so excited - but everyone I wanted to tell was asleep, so I didn't get to share the news till the next day.  I am going to be taking this class (I have also taken the previous 2 versions of it - always good projects, excellent samples, and clever tips!  Not only are Jennifer, Kristina and Julie hosting / teaching the class, but several other ladies near and dear to us will also be helping out with the teaching.  Suzanne Dahlberg is on our design team and we couldn't be more excited for them!  Laurie Willison and Nichol Magouirk also joined us as a guest designers during our first release and I'm sure we will see some awesome projects from them as well.  I also noticed some other teachers who are friends with w&w like Donna Mikasa and Amy Kolling.  Ladies - it is going to be a very fun 2 weeks ahead!

sneak1


Jennifer McGuire featured our stamps in a recent video tutorial on her blog.  We are huge fans of hers, and we were ecstatic that she gave us this big shout out!  Let's just say that Scenery: Big Bang Confetti and The Big, the Bold and the Happy  have never been more popular than they are now.  Love her card and we so appreciate her support!

030414-Glitter1-Jennifer-McGuire-Ink

Glitter Stamping Card and Video post - by Jennifer McGuire


Our 2nd release is only days away.  Monday we will begin sharing previews of the new stamp sets on our blog, plus we will have projects created by our talented design team.  I've already started seeing their projects and they are going to knock your socks off.  I'll give you a little hint.....we are featuring a theme that is near and dear to all of our hearts. I have a feeling that my MOM and DAD will just love it!

The next few months are going to have so many more exciting things to come - new designs, new projects, new products - it is a lot of work, but Shay and I are loving every minute of it. :)

I hope you will check back again soon - I plan to post all of the projects I make for Online Card Classes, as well as sneak in some time to catch up with my One Little Word class, project life (thinking I'm going digital this year, with occasional hybrid) and a Kamilla book that's just for me.

Thanks for stopping by and visiting the blog. Hope to see you again real soon!

Julie

Monday, January 20, 2014

One Little Word 2014 - January

Today I'm sharing my One Little Word layout for January.  Ali Edwards is hosting her One Little Word workshop again this year and I'm joining her for the ride!

This year my word is SHINE!  Last year I worked with the word BRIGHT but I got off track and could never get back into the project - too many life distractions.  One way that SHINE will be important to me this year is for me to shine a light of importance on things I want to do, and to not let things distract me from that path. I already feel like I'm shining with the amazing stamp release Shay and I had with winnie & walter back on January 15th! There are still many more things I want to shine at this year - I hope you will come back and see my process!

Last year, the plan was to put my OLW pages in my project life book.  This year, I wasn't so sure I wanted to do that.  I bought the Heidi Swapp Portfolio Album last year and never got around to making anything with it, and I have just picked up some Basic Grey divided page protectors that also fit this album.  I decided that I would use a variety of digital and paper elements for my layouts, and make them fit the pocket pages for this album.  I haven't decorated the front cover yet, but I need to do a little brainstorming first.

Here are my pages!

OLW-Jan2014-p1-full-wm


OLW-Jan2014-p2-full-wm


OLW-jan2014-quote

I have been hoarding my digital supplies - don't know why since they never run out!  I started going through them and found myself drawn to the purples and anything glittery.  I had many other items out, but decided to keep it rather simple.  Many of these products, if not all, were downloaded from The Lilypad - love their digital store!!!

I'm looking forward to seeing what is next with One Little Word!  Are you participating?  What is your word???

Digital Goodness!!!
APennington_Wonder_Patts&Backs (4)
onelittlebird-soiree-paper13 (lavender)
onelittlebird-soiree-vellum-stripeglitter
onelittlebird-soiree-paper02 (stripe)
onelittlebird-riseandshine-frame1
onelittlebird-soiree-journal-orchid
mmartin_pictureperfect_sequin


Friday, January 10, 2014

Winnie & Walter Red Carpet Festivities Continue!

It's been very busy here behind the scenes getting ready for the Winnie & Walter inaugural stamp release happening January 15, 2014.  So much has been going on.  Take a look!


What are you waiting for??? Get over there and maybe you will be a big winner!!

By the way....big things happening tomorrow too - lots and lots of eye candy!

See you there!!!

Julie


Thursday, January 2, 2014

Winnie & Walter Grand Opening

Hello everyone!

Just taking a moment to let you know about the big upcoming event at Winnie & Walter - check out the blog starting January 5th!


promo

Hope to see you there!

Julie

Wednesday, December 25, 2013

Christmas goodies 2013

I can't believe it is Christmas Day! This year's "Christmas Season" has been a little upside-down and caddywhompus and way too fast. Working on w&w goodies (did you get yours???), extra needs at work, Mom and Kamilla's birthdays, and getting ready for Christmas - and we caught a bug (glad that's over).  Here are some highlights!


Christmas-Collage-2_2013web


1. Breakfast at Cracker Barrel before a little Christmas shopping - Pecan Sticky Bun French Toast and Hot Tea
2. A beautifully decorated tree in the CB store.
3. Walter playing / observing the little bumble bee that bounces on surfaces.
4. Birds in the parking lot on a cold winter morning.
5. Kamilla opening Christmas presents.
6. Cute reindeer treat holder - by my friend Becky and her daughter.
7. Penguin decoration for a mason jar cake treat gift from a family at school.
8. Sheldon bobblehead that sits on your monitor - hee hee!!!  Thx Vickie!
9. Fiber Optic USB Christmas Tree with SmartBoard in the background.  Love the color changes!


Christmas-Collage-Mogford-2013web


1. Some of my favorite Christmas decorations - these are sitting on my grandmother's secretary. Love this snowman!
2. Yes, that is me with the man himself!!! So JOLLY!
3.  Yummy tangerines from Kathy M. to my parents.  They gave us a few to bring home.  So pretty.
4. Walter with his new Christmas toy from Santa!
5. Beautiful poinsettia from Lise Ann - look, it is still alive!!! - no green thumb here. :(
6. More Mogford decorations - favorites include the nutcrackers and we keep Nicolae's stocking hung too.
7.  Our humble tree with our giant bright colorful lights.  We never got around to adding any ornaments to it - so busy - but I didn't mind.


We had such a nice Christmas with things from our wish list, treats from friends and family.  We are so blessed.  I've been so busy this month, that when my package from Two Peas arrived, I never got around to opening it, until today.  OH MY GOODNESS!!!  Now, I have to admit that I added a little to the original gift card, but I never would have gotten any of this without Shay and her family's gift.  Let me just say - I can't wait to get started creating!!!


Shay-gift-Christmas-2013web


1. Just opening the box - look at all those sprays and thickers....I'm in heaven!
2. I picked up another Project Life album for a song, and a Basic Grey mini too. I'm thinking Kamilla photos..... :)
3. Yes, that is a 6x6 5th and Frolic and Yes, I'm the last person on the planet to get one.  Can you believe it took me so long? Ink, washi, wood vaneers, enamel dots.....{sigh}
4. Crate Paper HAPPY!!! Heidi Swapp sprays (including white)!!! Basic Grey and Studio Calico and a cute little stampset from Prima.

One happy girl!!!
It has definitely been a Merry Christmas!
Thanks Shay family!  What a treat!  :)
Thanks Mom and Dad for all of our goodies!

Merry Christmas everyone!
love, Julie, Davis and Walter


Saturday, November 23, 2013

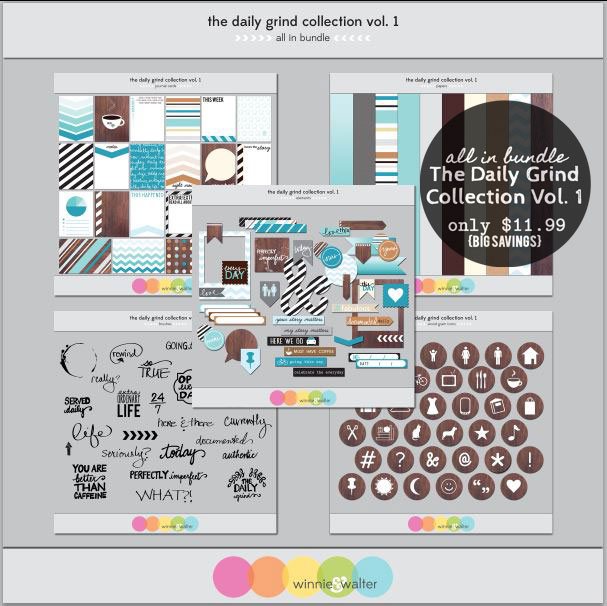
Winnie & Walter - The Daily Grind Collection, Vol. 1

I've been away for awhile, but have been VERY busy!!!  I should say that Shay and I have been very busy with Winnie & Walter!  Today, I'm happy to share with you our first digital products.

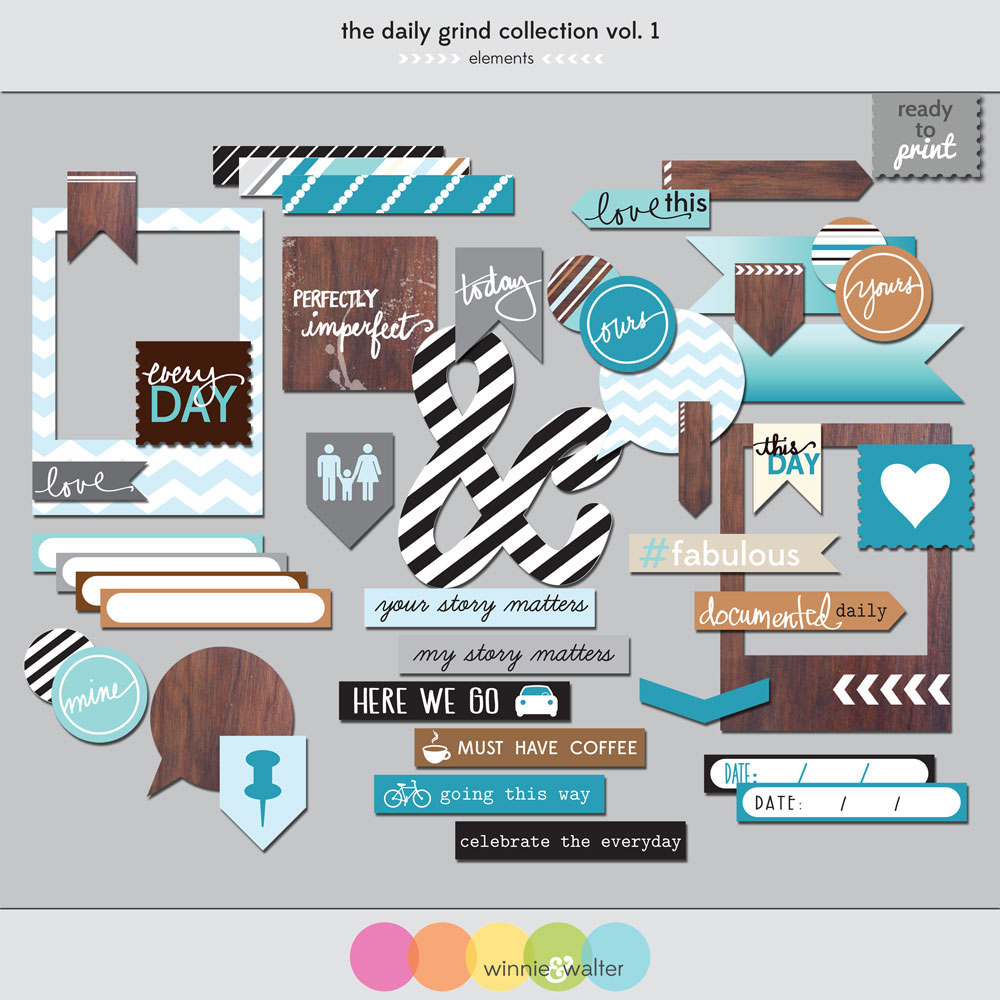
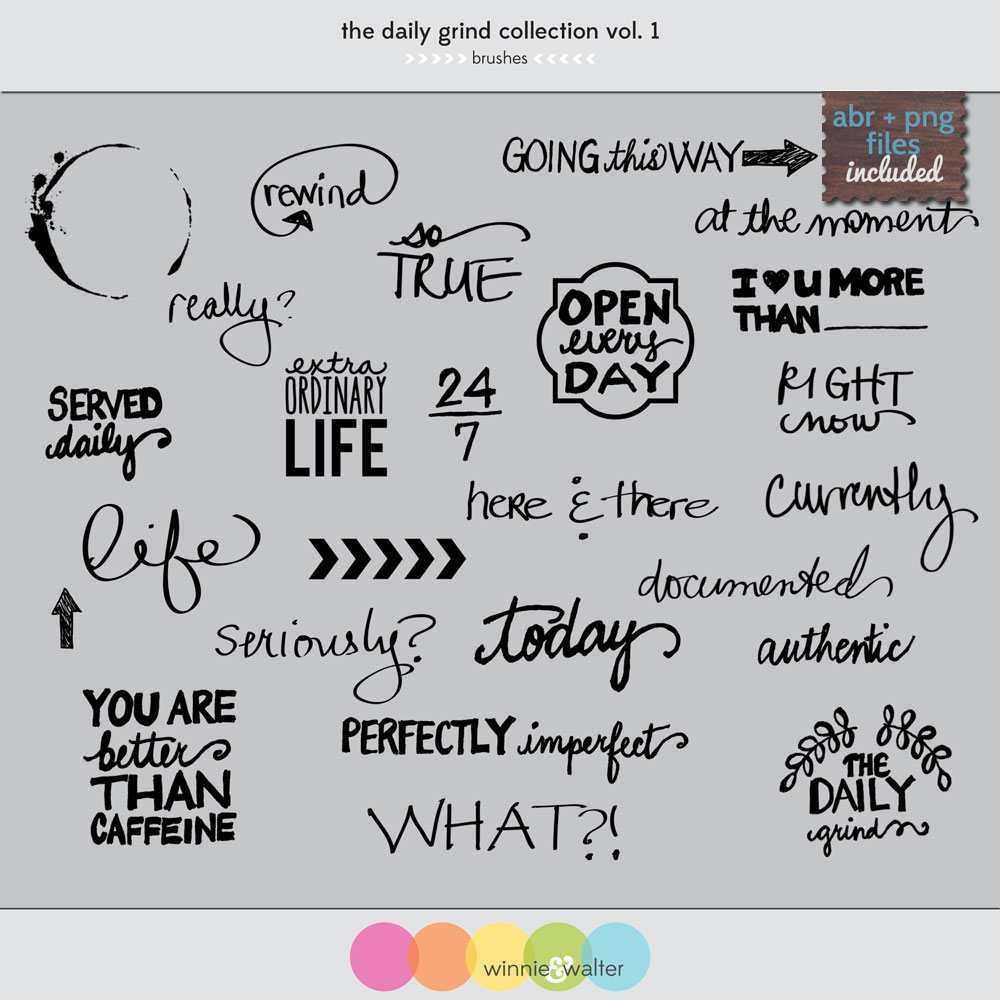
Winnie & Walter present The Daily Grind Collection, Vol. 1

The Collection consists of Journal Cards, Wood Grain circle icons, Elements, Brushes, and Papers created to be used both digitally or as printed elements!


I think what I like most about this collection is the color palette and its versatility.  I can use the elements easily with other things that are already in my stash - and you know I've got quite a lot in my stash.  And, if that wasn't enough, you can get all of these at a reduced price by buying the "All In" Bundle!


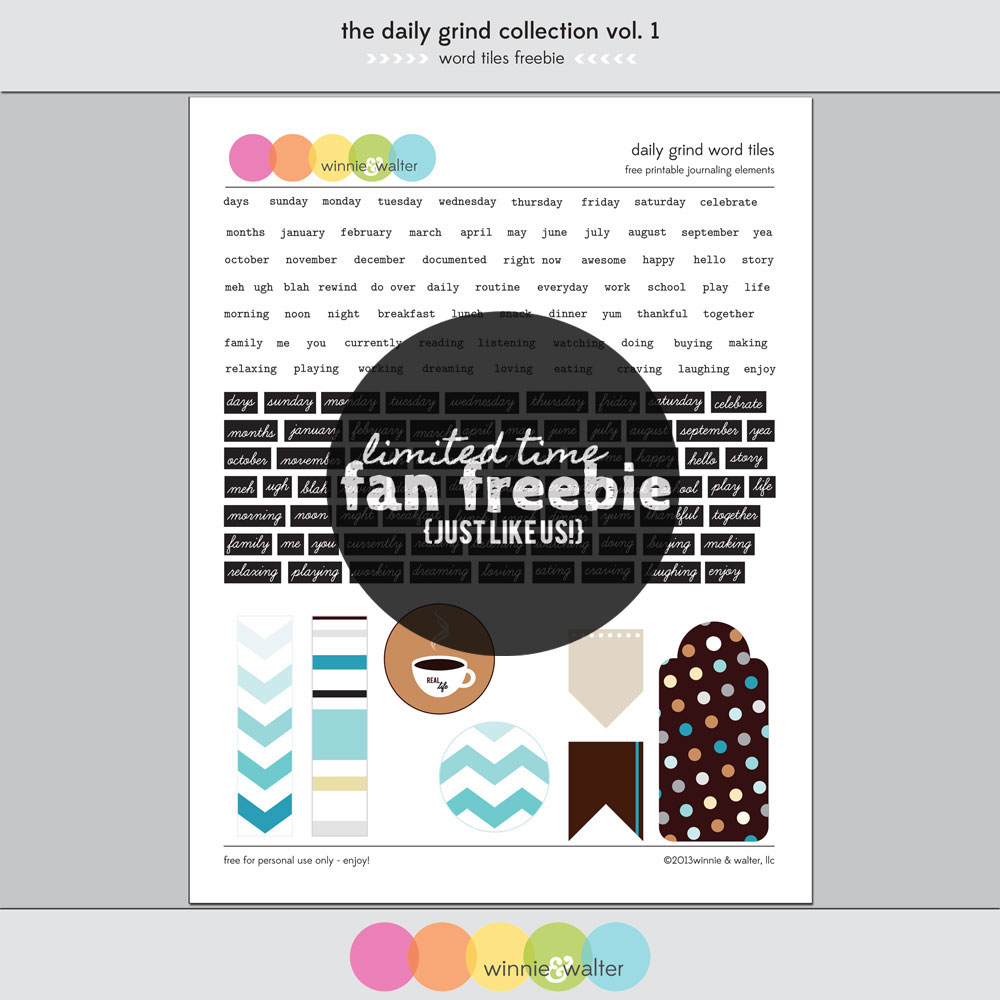
And - if you like us on Facebook, then you can get this fun, coordinating Word Tiles Freebie ...


and if you didn't pick up our last freebie, Live Laugh Love, you will find it in the Fan Freebie area of our Facebook page too!  Double Freebie Goodness!!!!


Check out project samples from Shay using the Live Laugh Love freebie.

You can find my samples projects for Live Laugh Love here and here.

Shay has some wonderful creations on the Winnie & Walter blog using The Daily Grind Collection, Vol. 1

It was so fun to actually get a chance to make some projects with this collection after working on the designs.  Here are a few things that I made using the printable PDFs.

jmog_ww_dg_loveyou3-WEBcredit

I was really wanting to use the chevron Polaroid element and the love tab in an unexpected way.

jmog_ww_dg_loveyou2-WEBcredit

I was digging in my stash and found this package from K&Company of fabric flowers and buttons and thought it would be cute on a card as the focal image.  I used foam tape to put the Polaroid frame on the card and then added each layer of the flowers and topped it off with a bejeweled button.  So pretty!  I thought that the love tab would be cute as part of the full sentiment so I added the "you" with these yellow thickers!  Fun Fun FUN!  This card has dimension without being too bulky.


jmog_ww_dg_urfab1-WEBcredit

On this card I wanted to use several of the patterns altogether plus another text strip for the sentiment. I have seen Kristina Werner do this technique several times and I really like it, but I haven't tried it in a long time.  I cut strips in different widths from the patterns included with the journal cards and glued them down side by side on a strip of cardstock and then trimmed to clean up the edges.


jmog_ww_dg_urfab3-WEBcredit

I love the #fabulous sentiment and thought using u and r would be a perfect finish in the bold white Thickers on the chocolate chip cardstock.  I am a little late to the sequin trend, but better late than never.  Shay gifted me several colors of sequins and this felt like a great place to add a little sequin sparkle.

I've been wanting to try my hand at Project Life with digital elements, so I used the various papers, elements, journal cards and brushes to create these layouts. I used the templates (now from the Digital Project Life store) made by Becky Higgins that I first in the Jessica Sprague shop.

jmog_ww_dg_pl1

Journaling: features fonts Zephyr, Statuesque and Notebook by Karla Dudley - love these!
Top row: Grey cardstock, Large chevron circle from the Facebook Freebie (see above), circle elements resized, "currently" and arrow brush. Element strips and postage heart.
Middle row: Kraft cardstock, coffee ring and caffeine sentiment brushes.
Bottom row: More kraft, wood grain icon coffee, striped ampersand.


jmog_ww_dg_pl2

Journaling: More Karla Dudley and Segoe print.
Top row: I typed the date in between the stripes of the 6x4 journal card. Love how this turned out. Days of the week from the Facebook Freebie, date strip from the elements and "seriously?" brush in white with a shadow.
Middle row: Graph paper, currently and teal daily text journal card. Extra ordinary life brush in teal, plus various wood grain icon circles to match journaling.
Bottom row:  I {heart} u more than brush in white with text added.  Photo collage created with PicMonkey - so easy.  The celebrate the everyday sentiment is a single strip, but I cut it apart in photoshop using the rectangle select tool to fit it in the space.

I was cracking myself up on some of these - my faves are the " 'sup" speech bubble for Walter and the Starbucks journaling for Davis. Makes me happy!!! :)

Be sure to check out the Winnie & Walter Blog for more details about The Daily Grind Collection, Vol. 1.  If you like to get the scoop on deals and upcoming products, you can sign up for the newsletter right on our blog.  Want to get this kit now?  Visit us at www.winniewalter.com !

Here are a few other places you can find us: Flickr, Twitter, Instagram, and Pinterest!    I think Winnie and Walter are really enjoying all of the attention they are getting lately!

GIVEAWAY
One more thing going on at the blog right now - sign up to win the whole collection!  Don't you just love free stuff???

Thanks for stopping by!  Happy creating!

Julie

All projects feature The Daily Grind Collection, Vol. 1 by Winnie & Walter.

love you card:
flower elements and button by K&Company, Thickers by American Crafts, pink ribbon by Stampin' Up!, Neenah Solar White cardstock, foam tape, 3 in 1 glue by Beacon, Mono Multi Liquid Glue by Tombow.

u r #fabulous:
chocolate chip cardstock by Stampin' Up!, Thickers by American Crafts, sequins, foam tape, Mono Multi Liquid Glue by Tombow.

project life - nov 4-10 and nov 11- 17 layouts: Karla Dudley fonts, Pic Monkey, Photoshop Elements, Becky Higgins digital templates

Wednesday, September 11, 2013

Live Laugh Love part 2 - Winnie & Walter

I can't believe it is September already, and nearly half-way through.  I have been so busy with the new school year that I haven't had much time to "get crafty".  So, I'm in my craft room, and I have another print out of the Live Laugh Love freebie by Winnie & Walter, and it's just begging to be used!  I was so inspired by the card designs that Shay created using this set, so I thought I would make a few cards too.  My mood kinda dictates what style of cards I feel like making and this time, I went with CAS - Clean and Simple.  These are SO clean and simple, that there is very little added to the card.  Lots of white space, great pops of color, no stamping at all (can you believe?) and they are super quick to make!

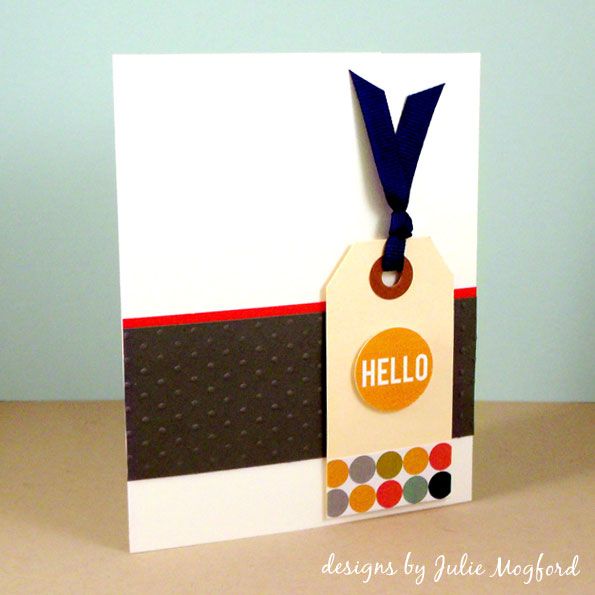
Card 1 - Hello

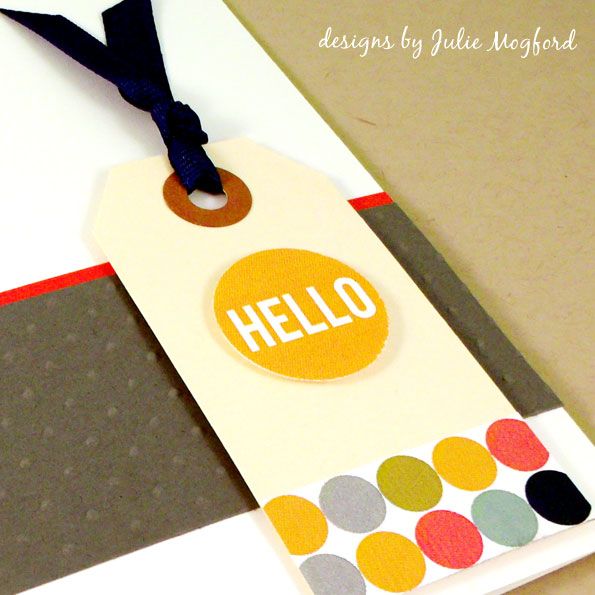
I used to make tag projects often, so there is a stash on my desk all the time.  I thought it would be fun to add a few elements from the printable to a small tag as the focal image.  I punched the "hello" circle from the journal card with colored rays, and used a pop dot to lift it up off the tag.  I also cut a strip from the dot pattern journal card and added it to the bottom of the tag to give it interest.  The blue ribbon is from my stash, and I wanted it to hold its shape and stand up. 


The gray panel was put through the Cuttlebug with a Swiss dot folder and I added a small strip of coral red cardstock to tie it in to the color palette and add an additional pop of color. The top of the colored dot strip of the tag is lined up with the bottom edge of the gray panel.  I liked this design idea and thought it added more interest.  This one was very different for me!


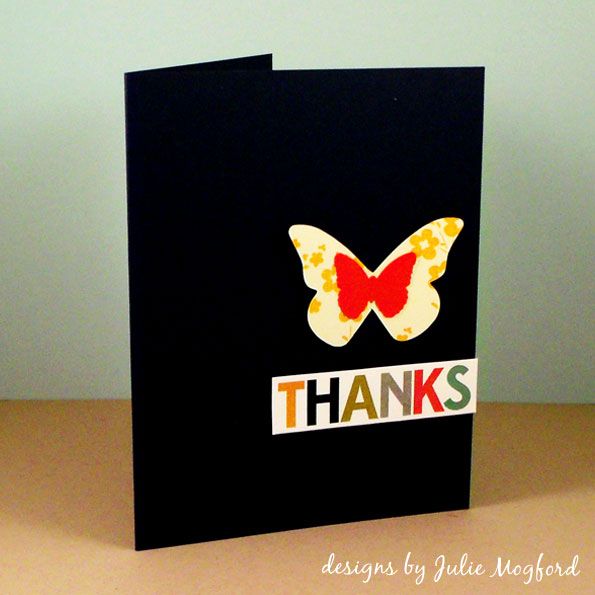
Card 2 - Butterfly Thanks


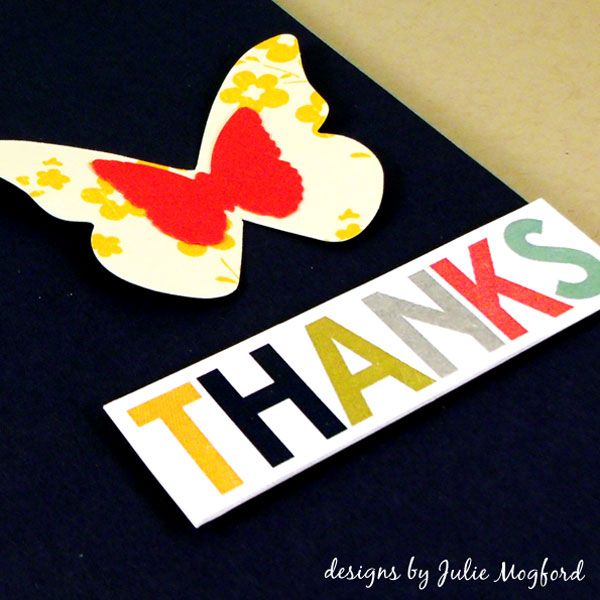
This card is actually navy (see below) but I really like the strong contrast between the card base and the bright colors on top.  You really can't get more simply than this.  I knew I wanted to use the THANKS strip from the printable.  I headed to my scrap stash and found some October Afternoon floral paper that was so similar to the yellow used on the T.  To contrast it, I used the same coral red cardstock from above and punched a small butterfly to layer over the floral.


The THANKS is popped off the card with foam tape. The butterflies are glued together, gently folded to give their wings some shape and only glued in the center where they attach to the card.  After giving it some good pressure, I gently lifted the wings to make sure they were lifting off of the card. Subtle dimension - Clean and Simple!


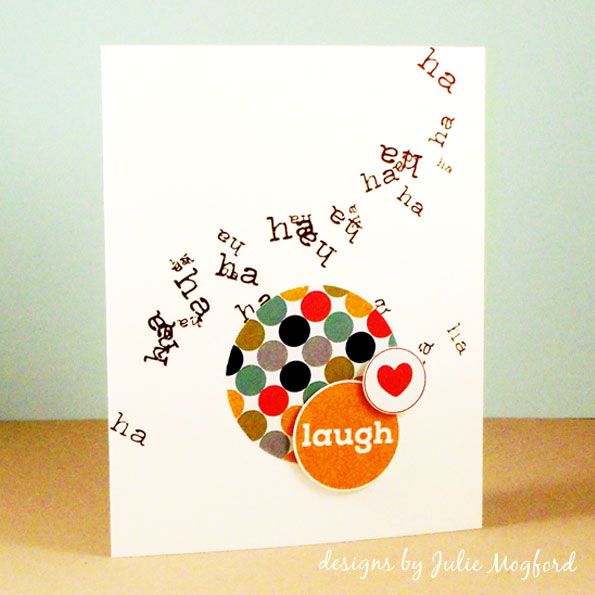
Card 3 - Laugh

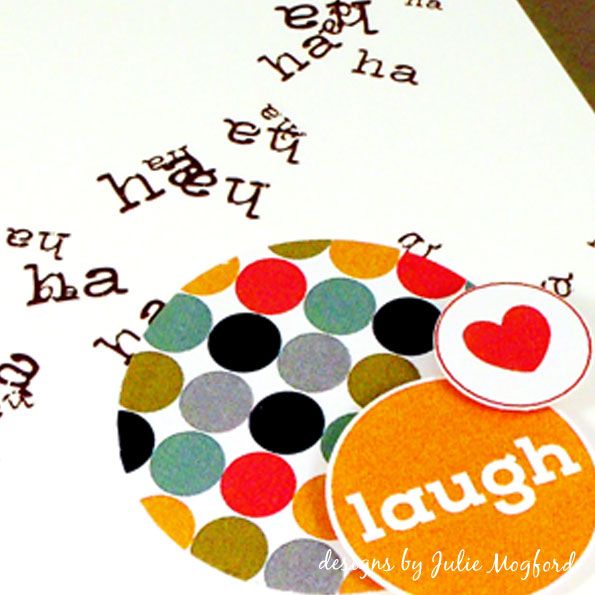
I don't know about you, but I think laughter is the best medicine.  This is a perfect card to lift someone's spirits.  I know it put me in a pretty good mood just making it.  The laughter on the background came from a set of rub-ons that I had been hoarding for a long time. I wish I knew where they came from - so cute! The ha's were already in this shape and overlapping.  It makes me feel like I'm laughing hysterically - that kind of laughter that is uncontrollable and actually makes you cry!  I LIVE for laughing like that!


The circles are all from the printable.  The large circle is a 2 inch punch from the same journal card used on card number 1 above. Multiple uses from one 3x4 card - not bad.  The laugh and heart are also punched from the page and popped up in layers with foam adhesive.  This is another one that was super quick - and super fun.

Are you wondering about the printable I keep mentioning?  Shay and I released this fun and FREE two-page printable from Winnie & Walter, a few weeks ago.  If you didn't get your copy before, I've added the link below and hope you will download, print it, and make something wonderful!


Like us on Facebook to get your copy of the Live Laugh Love Freebie!


We would love to see how you use these elements in your personal projects, so feel free to comment and add a link! 

Happy Creating!

Julie

Supplies:
live laugh love printable, Winnie & Walter
Cardstock: solar white, Neenah White;  coral red, gray and navy, stash
Patterned paper: Hometown Journaling Cards, October Afternoon
Dies: Butterfly, Stapmin' Up!
Other: Swiss-dot embossing folder and Cuttlebug, Provo Craft; dimensional adhesive, 3/4" and 1" punch, Stampin' Up!; butterfly punch, Martha Stewart; laughter rub-on and manila tag, stash;

Friday, August 23, 2013

Big Announcement!!! W&W

Hi everyone!

Today is a very special day for me, and for my friend Shay.   We are excited to present to you...


Winnie & Walter will be an online store hosting craft related products by the dynamic creative duo of J.E.R.Shay and Julie Mogford.

And, what would a Big Announcement be without a little something from us to you?  Today, we have a free --- yes, I said FREE --- printable (for your personal use) available for download.  This is a 2 page PDF that includes 4 - 3x4 journaling cards, 9 circle elements, and 5 coordinating items for your favorite crafting projects.  These elements are perfect for projects like card making, scrapbooking, Project Life, mini books, and more. 

Live Laugh Love printable:


Like us on Facebook to get your copy of the Live Laugh Love Freebie!


Need ideas?  Just check out Shay's creations using these little freebies, and my Project Life pages below.  Ok, I have to let you know that I did get a little carried away, and used all of the elements in this 2 page spread except for the THANKS.  But, be looking for that to show up on the blog in the near future.


As for my Project Life pages, the first week didn't have many pictures, so the extra journaling cards were very handy to fill in spaces with bright colors and fun designs.  I was able to use a couple of circle tags on this page, but I actually cut them in half.  The first one is on the top left pocket where the word date is used on the bottom edge and the rest of the circle is used on the top edge, and I added a cute heart sticker from Studio Calico. I also cut the "hello" circle in half and tucked it behind the Monday word strip.  I used the 7gypsies pocket to hold some private journaling, but decided to put a quote I found on pinterest recently, on the quotations journal card - the quote really spoke to me right now.  Love Love Love how the arrow shapes work on the bottom two pockets: multicolor chevron pointing to my DH and the "love this" pointing to my guilty pleasure - PROJECT RUNWAY!


 On page 2, I had to get choosy with my photos, and dear sweet Kamilla won out again!  I used the spiral journal card to share some of my favorite moments from the weekend and then added the note and date circles.  I wanted to journal a bit more about Kamilla, so I fashioned another card from the Seen and Noted 6x6 paper pack by Pebbles and the colors worked great with the TODAY, love and heart elements.  I liked using the Live Laugh and Love elements to draw your eye through the page, and connect them to help tell the story.  Using the heart and ampersand worked well with the love circle, and helped to fill the empty corner of the photo.  The navy "This makes me happy" arrow that is pointing to the bouncer is no joke - I watched her bounce for hours and she was so content, and I just sat back and watched her - true happiness!!


I really like how this set turned out and love all of the possibilities it provides.  And, there is much more where that came from.  Be sure to visit us often by following this blog and Shay's blog for more to come from Winnie & Walter! Enjoy!!!


Tip: If you wish to adjust the colors of the printables, I recommend using Photoshop or Photoshop Elements.  In Photoshop Elements under Enhance pick Adjust Color and then Adjust Hue/Saturation.  You can use the bars to adjust the hue, saturation and lightness as you desire.  For more information you can check out this simple tutorial: http://www.twopeasinabucket.com/cg_display.asp?g=4&seed_id=22398

We would be thrilled to see how you used the elements in your projects, so feel free to comment with a link!

Happy Creating!!!

Julie


Supplies
Stamps: Studio Calico stamps
Ink: Clear Snap Chalk Ink - Lime Peel
Paper: Seen & Noted by Pebbles, Clippings by Basic Grey
Embellishments: American Crafts Thickers "Flat" and "Rockabye", and rubons "Ned Jr", Basic Grey Urban Letters (&), Studio Calico hearts and arrows stickers
Other: Fiskars border punch, Stampin' Write Marker by SU!, Sakura Glaze pen, 7Gypsies Pocket

Friday, July 19, 2013

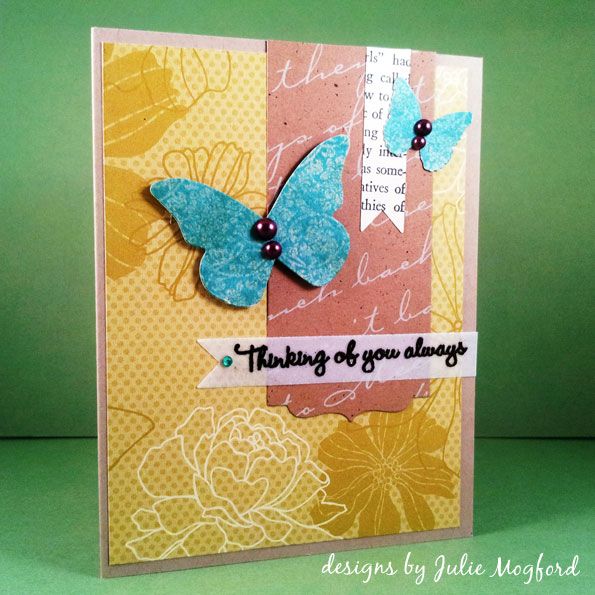
Summer Card Camp 2 - Week 2 Day 1 "Thinking of You Always"


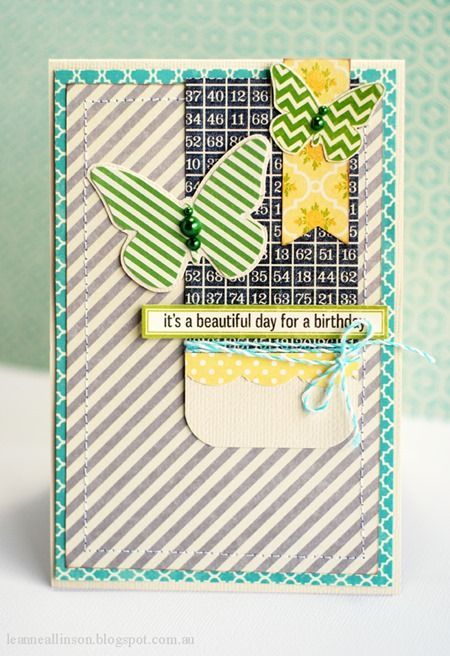
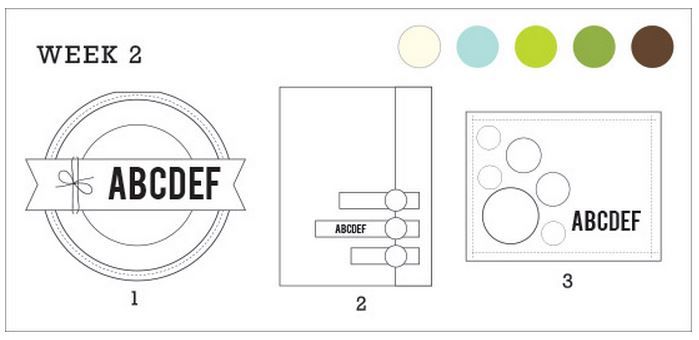
It's week TWO!  New colors and new sketches!  Today, I just used the color pallette to get started with my design and found an oh so cute card on Pinterest by Leeanne Allinson.  Here it is!!

Even some of this weeks colors are in her card too.  Here is my take on this card for the color challenge. My greens still don't look quite right, even after Photoshop. 


Step by Step:
1. Cut pattern paper and adhere to card base.
2. Cut banners and butterflies with die cut machine and / or punches. 
3. Stamp and emboss sentiment on vellum.
4. Adhere both vertical banner strips and butterflies, using foam tape for the larger one.
5. Adhere vellum with vellum glue.
6. Add pearls and gemstone.


What I love about this card: Love the layout and the various patterns and textures working together.  The pearls look great on the butterflies and coordinate with the embossing powder.  This card came together pretty quickly and I would love to do this sketch again - it was fun!


Supplies

Stamps: Thinking of you Always (Hero Arts), Have a delicious birthday! (Rubber Soul)
Ink: Versamark (Tsukineko)
Paper: Crumb Cake and Urban Oasis (Stampin' Up!), book text, aqua and craft pattern from stash
Additional items:  Double Ended Banners Die and Half and Half Die collection (PapertreyInk), Butterfly die (SU!), small butterfly (Martha Stewart), Pearls (Queen & Co.), gemstones (TPC Studio "Ancestral"), Midnight Bronze Obsidian embossing powder(Lindy Stamp Gang), Cuttlebug, Scor-Pal, Tombow tape runner, Recollections foam adhesive, Glue Dots brand for Vellum.

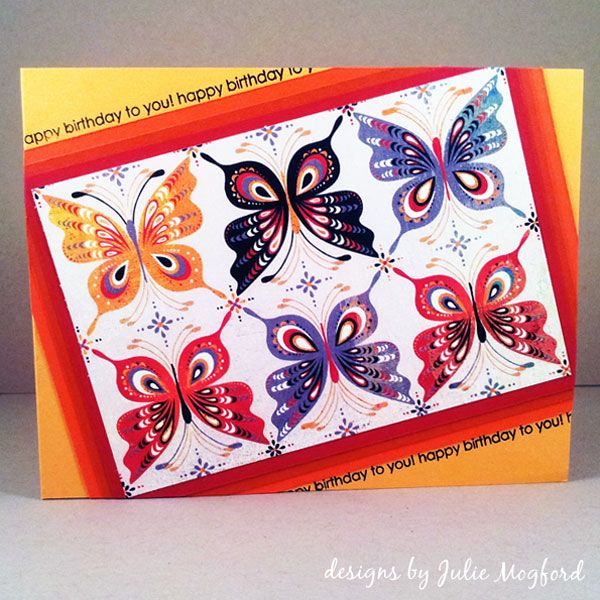
Summer Card Camp 2 - Day 5: Butterfly Birthday - New Color Challenge


So, I get up early to see what the challenge was for day 5 of Online Card Classes - Summer Card Camp 2. I love color challenges. I looked through our choices and picked this one.

As I am looking through my supplies (yes my Basic Grey collections are begging to be used instead of sitting on the shelf) and I find Ambrosia - Winsome.  Guess what - I think I might be color blind!!!  I shouldn't joke, but the color combo above is NOT the color combo of the paper I chose.  And, of course, I didn't realize it till I was all done.  But, I do love the card.  I had filmed a video for you, but the lighting wasn't very good, so I will just take you through the steps here.


1. Cut pattern or design for front of card.  Then for the ombre of colors, cut them in quarter inch increments larger for each color.  My dimensions were:
          image: 3.25 x 4.75in
          red: 3.5 x 5in
          burnt orange: 3.75 x 5.25in
          orange: 4 x 5.5in
          card: 4.25 x 5.5in

2. Glue the image and cardstock colors, centering them on the next larger item.
3. Glue the panel to the card at a diagonal using enough adhesive to make contact with card where corners go off the edge.
4. Using strong scissors (I used my Tim Holtz Tonic scissors), but the image panel corners that hang over the edge of the card.  I turned my card over to see where I was cutting and cut slowly for a clean cut.  The paper will be thicker, so these scissors were great.
5. Stamp thin line sentiment in black in along diagonal edge of image panel.
6. Stamp additional sentiment inside of card.
7. Cut one butterfly from extra pattern paper and glue to inside of card.


What I love about this card: The butterflies in the grid pattern on the diagonal - nice! An ombre of bright warm colors definitely feels like summer.  I liked the tiny word sentiment that I was able to fit so close to the edge of the stacked cardstock - I think it sets it off nicely.

Supplies

Stamps: Around and About sentiments (Papertrey Ink), Birthday greeting on inside (Hero Arts)
Ink: Versafine Black Onyx (Tsukineko)
Paper: Cardstock (Stampin' Up!), Winsome / Ambrosia (Basic Grey)
Additional items:  Scor-Pal, Tombow tape runner, Tim Holtz scissors (Tonic)

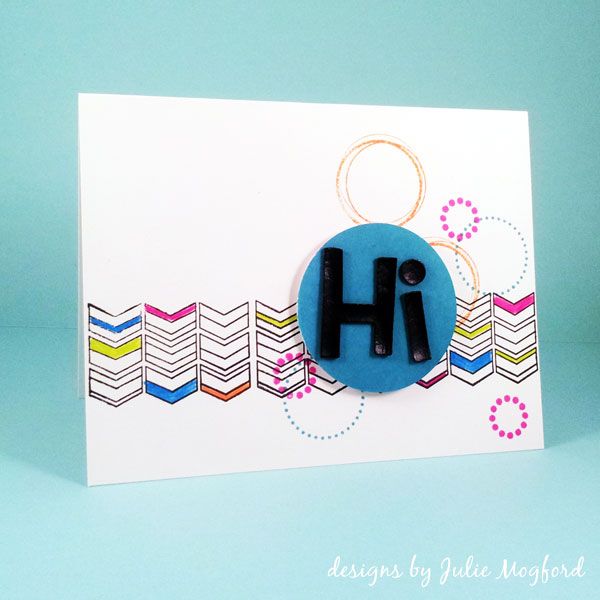
Summer Card Camp 2 - Day 4: Time Challenge "Hi"


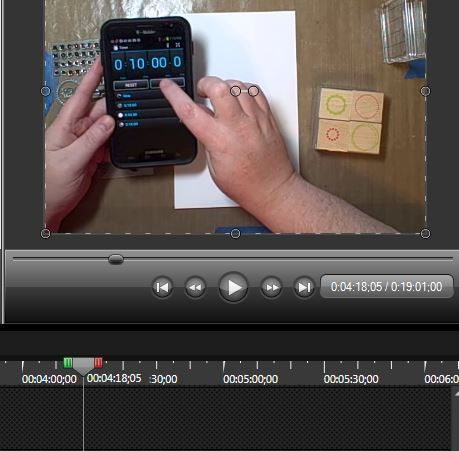
In the Online Card Classes - Summer Card Camp 2 , our challenge was to make a card in 10 minutes.  My husband won't believe this when he sees it, but I made a card in under half an hour.  I went over a little, but not too much! LOL


I went into my video editing program and took this screenshot.  I talked a lot at the beginning of the video which I cut most of that off.  Here is the mark where I set the 10 minute timer - the total video was 19:01 and I get to take 4:18 off of my time for babbling. That puts me at 14:43.  If I had gotten my ink and tested it earlier, I could have shaved even more time.  So YEA for me :)  FYI: I did the math on my time here.  Since my video was a little longer than 10 minutes, I am sharing it from Vimeo today.

For your viewing pleasure:

10 minute hi from Julie Mogford on Vimeo.

What I love about this card: Bright colors, bold sentiment, on trend chevron design - love love love!  And, can I just say, 10-ish minutes???  LOVE THAT!


Supplies

Stamps: Exclusive: Summer Stamp School (Studio Calico), Layering Circles (Hero Arts)
Ink: Versafine Black Onyx (Tsukineko), Distress Ink in Broken China, Picked Raspberry and Spiced Marmalade (Ranger)
Paper: Neenah Cardstock
Additional items: 2inch Marvy punch, Prismacolor Pencils, Thickers (American Crafts), Scor-Pal, Tombow tape runner, Recollections foam adhesive.


It's nice to be exercising my creative muscles again!